Sometimes when you prepare or update an wim image for MDT you realize that you forgot to add/remove something. Common thing that happens after testing the image is that sysprep or YOU – forget to remove user account from registry (or via compmgmt.msc) but only delete user directory in c:\Users.
In that case when you deploy a computer using such an image. User that wasn’t deleted is welcomed with Temporary user profile – every time he or she logs in. You may want to ask: damn, who logs as an domain user on computer that will be syspreped?! I tell you. You as an admin!
You test your image, login as domain user with admin privileges and voila! Silly, me…
Ok, so how to fix this problem?
The cause:
Information about domain account is still present in registry in .wim file at:
HKEY_LOCAL_MACHINE\SOFTWARE\Microsoft\Windows NT\CurrentVersion\ProfileList
Now, we need to get rid of that somewhow.
There are two (or even more) ways to accomplish this.
The easy but long way is to deploy that image, open regedit and remove information about affected profiles from above key. Or even better info about all domain accounts! And off course capture image again. 2 hours…
The second way is more complicated but much faster as we are not deploying and capturing an image again.
We need to:
- Login on MDT server (or somewhere where we have dism installed)
- Copy affected wim image somewhere (always make a backup!)
- Open command prompt as an Administrator
- Mount wim image by issuing following command:
dism /mount-wim /wimfile:"D:\Deploy\Operating Systems\window
s7pro\windows7pro_sp1_upp_20160129.wim" /index:1 /mountdir:c:\mounted
Short description:
- /WimFile:Location to original(copied) wim file
- /index:1 – number of partition
- /MountDir:Location to where files should be mounted
Keep in mind that there is NO space/gap between /WimFile and /MountDir switches and locations!
Now, we need to edit the registry of mounted image:
- Open Regedit
- Select HKEY_LOCAL_MACHINE and click File/Load registry hive
- Navigate to System32\Config of mounted wim image and select SOFTWARE
- Type in some name for it, like remote_software
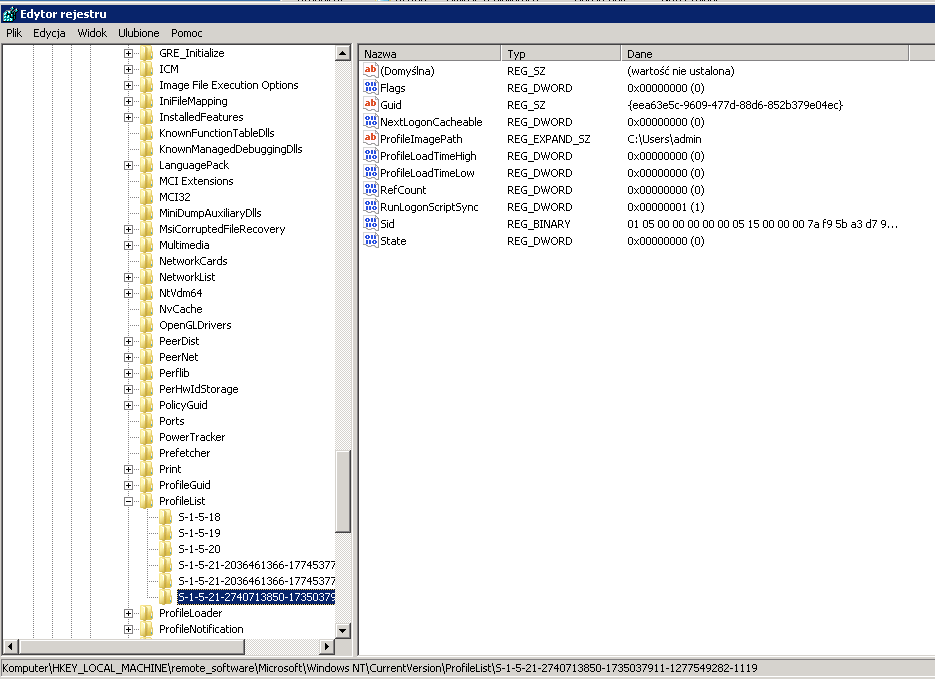
- Now, navigate to
HKEY_LOCAL_MACHINE\remote_software\Microsoft\Windows NT\CurrentVersion\ProfileList
- now remove information about affected profiles from above key, like:

- Now, we need to unload that hive, by clicking File/Unload registry hive
- Close regedit, close any opened explorer or any window displaying contents of mounted wim directory
- Back to command prompt, we need to commit changes and unload wim image by issuing command:
dism /unmount-wim /mountdir:c:\mounted /commit
After a few moments, image is saved in where it was loaded from (/wimfile switch).
That’s all! Now, we can test the new image and domain accounts. Now there should be no temporary profile warning when using affected domain accounts!
![]()
This is great. I was running into this issue and wasn’t sure why or what changed. I noticed that when one of my guys was staging the PC he would join to the domain, create domain user profile and then run through the imaging process. It dawned on me when he said he was getting errors and had to remove the PC from the domain first to image. Haven’t confirmed the fix just yet but this is exactly what I’m running into.
Yeah It happens lot of Times. Strange that sysprep is not removing information about domain accounts or there is no switch to to remove them when capturing image.
Hope this will work for you. Keep it in mind, that there is already new version of mdt but I didn’t test it yet