6. OCS NG Configuration
In this chapter we will configure few things that I consider useful and nice to have. Those are optional but I just recommend them based on my experience. The following things will be configured:
- Apache default webpage changed to /ocsreports. No more necessity to input /ocsreports after hostname/ip address in order to get to OCS Reports
- We will enable SSL for Apache and OCS-NG
- We will disable HTTP Access to /downloads directory
At the end we will install OCS-NG Agent on Windows machine, collect some data and deploy a sample software.
6.1 Change Apache document Root
Ok, tired of constantly entering /ocsreports in order to get to your reports console? Well, me too. Let’s take care about it:
nano /etc/apache2/sites-enabled/000-default.conf
comment out the following line:
DocumentRoot /var/www/html
And enter line below:
DocumentRoot /usr/share/ocsinventory-reports/ocsreports
Now, just restart Apache and that’s it!
service apache2 restart
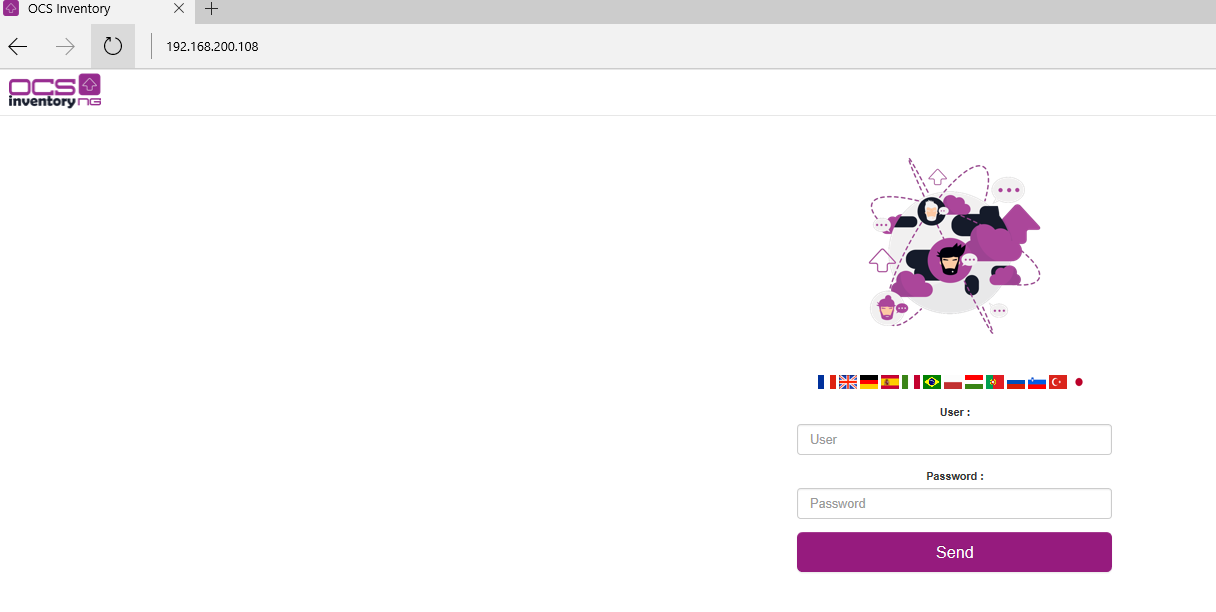
Now you can access the ocs reports by entering IP/hostname in the address bar:
6.2 Configure SSL for OCS Inventory NG Server
So far have successfully installed and performed basic configuration of OCS-NG 2.3 server. It all works well. We are able to start managing computers and their inventory.
However we are unable to use deployment future since it requires a valid SSL certificate both on server and on clients. HTTPS communication is used to download, the info files from the server.
Before deploying agent to the clients be sure to test it with SSL certificate installed on server. If they can talk to each other and if client can successfully access /download location on the server you’re ready to deploy it on large scale.
IMPORTANT!
For this example we will use a self signed certificate for SSL. If you have your own, trusted root CA or can request a SSL cert I strongly recommend this, since it will be trusted by your OS, so no annoying pop-ups on accessing HTTPS will be displayed about untrusted self signed certificate.
Let’s do it!
First of all we need a SSL certificate. In order to be able to generate it we need a few things on our Debian environment. Let’s start with:
Installation of packages:
apt-get install –y openssl
now, enable ssl mod in Apache and restart Apache daemon:
a2enmod ssl
service apache2 restart
After this command a new symbolic link called default-ssl.conf will be created in /etc/apache2/sites-available
Let’s enable it by creating a sym link:
ln -s /etc/apache2/sites-available/default-ssl.conf /etc/apache2/sites-enabled/default-ssl.conf
After above command a new symbolic link called default-ssl.conf will be created in /etc/apache2/sites-enabled/
Ok as we have running openssl we need some certs, don’t we? ?
Following command will generate a key for the certificate:
openssl genrsa -des3 -out ocsng.key 2048
Enter and note somewhere (or remember) a pass phrase for the key
Mind, that we are using 2048bit key length because most modern OS will block using keys shorten that that. IETF recommends using at least 2048 or 3072 or even 4096 bit key length since American agency NSA confirmed that they are able to decrypt 1024 keys, so 2048 shouldn’t be a problem in near future.
Back to guide:
Convert the key to RSA:
mv ocsng.key ocsng-old.key
openssl rsa -in ocsng-old.key -out ocsng.key
enter pass phrase
Now, we need a certificate request:
openssl req -new -key ocsng.key -out ocsng.csr
Fill in all fields:
- Country Name (2 letter code)
- State or Province Name (full name)
- [Some-State]
- Locality Name (eg, city)
- Organization Name (eg, company) [Internet Widgits Pty Ltd]
- Organizational Unit Name (eg, section)
- Common Name (e.g. server FQDN or YOUR name)
- Email Address
IMPORTANT!
Remember to enter the same name in “Common Name” that will be used for connecting by client computers. Otherwise agents will not be able to communicate with server.
No need to provide extra attributes. There is, however a little trick that can be done. We can provide more than one common name in request to make sure all names are valid: like ocsng.domain.com, ocsng and other dns names or aliases. There is very nice guide how to do that.
If not, simply enter below command to generate certificate in .pem format:
openssl x509 -req -days 3650 -in ocsng.csr -signkey ocsng.key -out ocsng.pem
copy files to Apache SSL directories:
cp ocsng.pem /etc/ssl/certs/
cp ocsng.key /etc/ssl/private/
Now, we need to tell Apache that it should use new certs:
nano /etc/apache2/sites-enabled/default-ssl.conf
Comment out below lines [with #] and insert below ones:
SSLCertificateFile      /etc/ssl/certs/ocsng.pem
SSLCertificateKeyFile /etc/ssl/private/ocsng.key
now in default-ssl.conf we need to append /download folder config. Simply add below lines just before </VirtualHost> at the bottom:
<Directory /var/lib/ocsinventory-reports/download>
                <IfModule mod_authz_core.c>
                 Require all granted
                </IfModule>
                <IfModule !mod_authz_core.c>
                 Order deny,allow
                 Allow from all
                </IfModule>
        </Directory>
        Alias /download /var/lib/ocsinventory-reports/download
Restart Apache one more time:
service apache2 restart
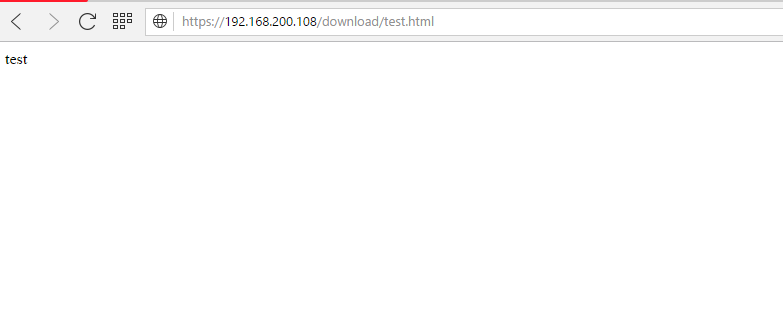
Then, echo some file into /download folder by issuing simple command just to make sure it works correctly:
echo test >> /var/lib/ocsinventory-reports/download/test.html
Now, try to access https://IP/download/test.html:
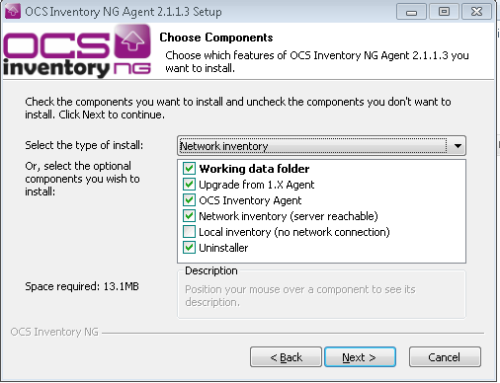
Now, we are be able to set /SSL=1 and enter HTTPS URL in OCS-NG Agent Configuration!
![]()
Thanks a lot, i was struggling (a lot) to understand why i had the “WARNING: Can’t find information file at https…” error… you confirmed that i am not that crazy…
one comment : there’s sometinhg missing in the default-ssl.conf :
DirectoryIndex disabled
Options Indexes
Require all granted
Thanks for the comment! I was surprised as well with that warning but I found that deployment just works. Don’t know , however, what you mean by there’s something missing in default-SSL.conf. Lines you posted seems good: Users are not allowed to index/browse folder, and all users are allowed to access. Do you see any errors? Can you post them?
Great job and good stuff !
Thanks for the feedback. Good to know that it worked for you!
I’M so sorry man, i made every step jus like you said….but for the 3º time, my oassword don’t go. I use the same user and password on website that a put on phpmyadmin and apache2.conf……what should I do?
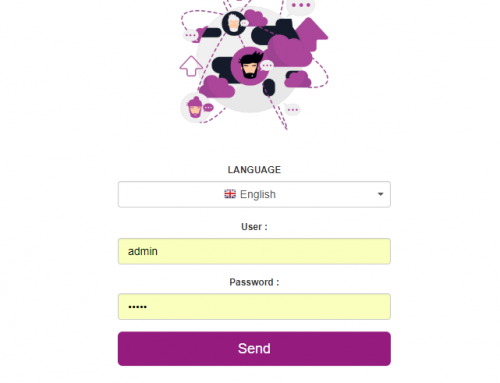
If you are talking about first time login to Ocs-ng just input admin/admin :) that’s the problem?
Man, thanks a lot…. worked……I know that my questions are newbie questions,,,,,but is just because I’m learning right now on the university…..and I have another question…..on my VM I only installed because I installed the build-essential before to run the ‘./setup.sh’ why can’t I install like your tutorial if I’m doing what u tell to do? can u tell me something…..and I’m trying to do this to make a link to glpi in the same server….thanks a lot…….
Hi Johny, I do not know what distro you are using?
Hello i made every step but my w10 is no’t importing in my ocs server :/
Any errors? Logs please? Server url added correctly with ocsinventory at the end? If you have valid SSL cert, you MUST include it in ocs agent or add later in order to use https. Paste agent log files for start, cheers!
I can’t access to myip/ocsinventory.
This is my log :
********************************************************
Starting OCS Inventory NG Agent 2.3.0.0 setup on 17/03/2017 at 11:20:55
Checking if setup not already running…OK.
Checking Operating System…OK, Windows 2000 or higher.
Command line is: “B:\ocs\OCSNG-Windows-Agent-2.3.0.0\OCSNG-Windows-Agent-2.3.0.0\OCS-NG-Windows-Agent-Setup.exe”
Parsing command line arguments…OK.
Checking for silent mode…Disabled.
Checking for splash screen…Enabled.
Checking if logged in user has Administrator privileges…OK.
Creating directory …
SetACL allowing Users / Power users read/write permissions on …Result: error
SetACL propagating inherited permissions on …Result: error
Trying to determine if service was previously installed…Yes.
Trying to stop service and kill processes…
Is Service running…Yes.
Trying to stop Service …Ok
Is Service running…No – Waiting 1 second(s) for Service to stop…
Trying to kill process OcsSystray.exe…Result: 0
Trying to kill process OcsSystray.exe…Result: 603
Trying to kill process OcsService.exe…Result: 603
Trying to kill process OCSInventory.exe…Result: 603
Trying to kill process download.exe…Result: 603
Trying to kill process inst32.exe…Result: 603
Waiting 10 seconds for processes to terminate…
Copying new files to directory …
Windows XP or higher detected, installing default cURL library and MS CRT/MFC 9.0…
Copying new files status is ;-)
Writing agent configuration file by launching ocsinventory.exe /SAVE_CONF…Result: 0
Windows Advanced Firewall is not available (Vista or higher). Skip adding custom rules.
[/NOW] used, so launching “C:\Program Files (x86)\OCS Inventory Agent\ocsinventory.exe”…Result: 4
Creating startup menu shortCut to start Systray applet…
Checking if service OCS Inventory Service is registered into Windows Service Manager…Yes
Nothing to do to register OCS Inventory Service into Windows Service Manager.
Starting OCS Inventory Service…Ok.
SUCCESS: OCS Inventory NG Agent 2.3.0.0 successfully installed on 17/03/2017 at 11:22:06
;-)
Can you post OCSInventory.log located in C:\ProgramData\OCS Inventory NG\Agent
Then if you can post apache access.log and error.log from server? Any other errors?
Also I don’t see any server information in posted log file.
Hi !
I encountered a problem at the end of ssl encryption. I followed every steps like you but when I try to connect to my ocs with my desktop at https://my_ip/ocsreports the ssl don’t work and it told my that the website is not safe.
Thanks in advance for your help :)
This is normal! If you generate SSL cert that is self signed and the signing Party(aka certification authority) is not in your trusted root CA store on Windows box(or ssl store in Firefox) it will give you that kind of warning. That’s normal. You can safely ignore that warning and proceed with using OCS.
Thanks for the help !
Is there a way to ensure that the certificate is authorized and the site is “safe” when I’m using Chrome, firefox or IE ?
Yes it is. You can follow the steps. The cert is for OWA but you can adjust steps to cover your cert: https://blogs.technet.microsoft.com/sbs/2008/05/08/installing-a-self-signed-certificate-as-a-trusted-root-ca-in-windows-vista/
FF has it’s own certificate store so you need to add it in FF options. If you have AD you can deploy that cert through GPO.
Hope this helps, regards
Hi !
Thanks for your awesome job here, this site is a gold mine !
I encountered a problem a the end of ssl part. The SSL works when I’m on my linux VM but when I go to https://my_ip_server/ocsreports the SSL don’t work and it told me that the website is not safe.
I don’t understand why… Can you help me pls ?
this article is wonderful, congratulations.
i have a problem….
when I export to XML received ACCESS DENIED
can you help me?
thansk you
Could you share a bit more information what do you want to export to xml? Computer data? You can examine access.log and error.log in apache. Maybe some permissions are missing somewhere?
thanks for your answer.
this access denied is when select any computer for view all componets such as network, memory, hard disk, ertc y go to Export XML.
I don’t any errors in the logs of Apache.
I suppose that is an error in permission but i don’t see.
please a need your help.
thanks you
I tried what you did on a fresh install and I was able to download the xml file without any problems. is www-data owner of /usr/share/ocsinventory-reports and /var/lib/ocsinventory-reports. What OS you are running?
thank you, nice job.
Thank you for the feedback. You’re welcome!
Hi Milosz,
thanks for your tutorial. I’m having a problem:
-Starting OCSLogon from cmd: C:\Users\asdf\Desktop>OcsLogon.exe /SERVER=https://ocsng/ocsinventory /PACKAGER /DEBUG
Logfile:
Downloading the ocs package from Server fails with Downloading file without server authentication…SendRequest Error: Failed downloading file !
-If i open URL with Firefox->Download start.
Where could be the problem?
Ps. With /GPO everything is fine…
hi Peter, never actually used ocslogon. I used packager to all types of install as it has all in one (certs, config, etc.). But back to your problem. From official github you must specify all parameters required by agent to communicate. I would start with /SSL=1 and provide login and pass if server requires that. Here is the info on github: https://github.com/OCSInventory-NG/WindowsAgent/tree/master/logon
[…] logue como admin admin Usei como base o tutorial: https://miloszengel.com/ocs-inventory-ng-2-3-complete-install-guide-on-debian-8-7-jessie/4/ Porém fiz o teste com esse script no ambiente Ubuntu e com a versão 2.3.1 do OCS, ou seja, este […]
Thank you for the comment and linking to my blog! Didn’t get the full comment but i believe this guide worked for you as well :)
Muito obrigado!
I did everything according to the instructions but i have error this is log from agent:
Starting OCS Inventory NG Agent on Friday, May 05, 2017 14:02:56.
AGENT => Running OCS Inventory NG Agent Version 2.3.0.0
AGENT => Using OCS Inventory NG FrameWork Version 2.3.0.0
AGENT => Loading plug-in(s)
AGENT => Using network connection with Communication Server
AGENT => Using Communication Provider Version
AGENT => Sending Prolog
ERROR *** AGENT => Failed to send Prolog
AGENT => Unloading communication provider
AGENT => Unloading plug-in(s)
And this is log from apache:
[Fri May 05 13:53:03.377784 2017] [ssl:warn] [pid 1760] AH01909: 127.0.1.1:443:0 server certificate does NOT include an ID which matches the server name
[Fri May 05 13:53:03.381924 2017] [mpm_prefork:notice] [pid 1760] AH00163: Apache/2.4.10 (Debian) OpenSSL/1.0.1t mod_perl/2.0.9dev Perl/v5.20.2 configured — resuming normal operations
[Fri May 05 13:53:03.381944 2017] [core:notice] [pid 1760] AH00094: Command line: ‘/usr/sbin/apache2’
this is error from agent
SSL peer certificate or SSH remote key was not OK
Hello Maciej, yes according to logs you posted there is a problem with SSL certificate. Most common problem is CN/subject name not matching hostname/ip configured on the client side. You should always enter the same subject name/ip address that will be used for connecting. I added note about that. Thanks for your comment
Excellent blog.You’re doing a great job.
I had a little problem creating and seeing an SSL certificate..
A little note if we want to use Software Deployment:
If we used the server name instead of the server IP, when we created the SSL certificate, then we have to remember when activating the package and write the appropriate: https://name_ocs_server/download
The above can be set on the OCS server (to automatically supplement the server name instead of IP):
Menu config> deployment> DOWNLOAD_URI_FRAG> customize (name_ocs_server/download).
Same for DOWNLOAD_URI_INFO.
Thanks for your comment. Yes, server by default provides ip instead of hostname/fqdn so setting that in SSL must be followed by change in the config. Thanks for pointing this out!
Hello,
Thank you for this job. Very helpfull.
But I have a question, how can I inventoried printers please? Thanks
Hi, you can inventory every device that implement SNMP. Basically it works without agents and you need to configure snmp both on client(community user and pass for read/write data). Then on server you need to provide that info to process the data. Also very useful is ip discoverer feature that will periodically scan all net to get new devices. Link to official wiki: http://wiki.ocsinventory-ng.org/index.php?title=Documentation:SNMP
Great job! Works fine!!!
Thanks for feedback, glad it worked for you!
Thanks Milosz,
I wasted 3 days to configure OCS on Ubuntu 14.4, finally installed on Debian.
Thank you once again…
Thanks for your feedback. I just prefer Debian over Ubuntu. Without arguing which distribution is better I just find it easier to play with. That’s why all my guides are on Debian:)
Can I create a distribution pack executing a command with a saved path?
Eg – copy “c:\program files (x86)\file.txt” c:\
The problem is that each OCS parameter is starting and ending with the symbol “.
How to properly write the syntax of such an EXECUTE command in this case?
up
batchfile only?
To be honest with you apart from some rare cases i always use batch file. You can include logic, variables etc in it.
I haven’t tested double quotations’ but I think it should look like this: “command ‘text with space'”
Unfortunately OCS replaces inside .bat file, character ” to similar character ” but not the same (if you know what i mean) and the command does not execute correctly.
Double quotation ‘ “path” ‘ doesn’t work.
Can you attach that bat file? Seems strange to me as commands are inside the batch file and OCS has nothing to do with it. I would recommend checking file encoding? Maybe that is the case here?
i’ll try something like this (line from a batchfile):
cscript “C:\Program Files (x86)\Microsoft Office\Office16\ospp.vbs” /dstatus > c:\file.txt
Try to embed full path to cscript OR include all in cmd /k cscript […] this will startup new command host and automatically close it after execution. Since it starts(should) as System account end user will not see it anyway.
“cmd /k cscript […]”
Thanks, This method works fine.
No problem, glad it worked for you!
Another question
Do you know of any easy way to re-install a package that was previously installed using the deployment package? Every time I get SUCCESS_ALREADY_IN_HISTORY status and nothing happens.
yes, it’s quite easy. Client checks the contents of history file in ocs agent directory in c:\programdata. In order to delete it stop the ocs service.
Hmm, but deleting the history file will remove all information about previously installed packages on that station.
On the other hand it’s a bit annoying to delete one history file from each station.
Is it possible to disable OCS overwriting a history file?
Hi Milosz,
the new stable version of OCS Inventory (v. 2.4) is now available…
Thank you for your great work around OCS Inventory NG !
Kinds regards,
Stephane
Yes I know. I will create a new guide soon :)
Could you make another great install guide for OCS Inventory NG 2.4?
hey, some time i will. currently a bit busy with setting up complete wordpress on newest debian – from the scratch :)
I followed your guide, and get the server and everything running, but cant get the agent to conect, this is the log: ==============================================================================
Starting OCS Inventory NG Agent on Monday, December 18, 2017 11:34:00.
AGENT => Running OCS Inventory NG Agent Version 2.3.1.1
AGENT => Using OCS Inventory NG FrameWork Version 2.3.1.1
AGENT => Loading plug-in(s)
AGENT => Using network connection with Communication Server
AGENT => Using Communication Provider Version
AGENT => Sending Prolog
ERROR *** AGENT => Failed to send Prolog
AGENT => Unloading communication provider
AGENT => Unloading plug-in(s)
AGENT => Execution duration: 00:00:00.
I find the solution to my problem, it was that in the config file of the server I put the ip of the server instead of “localhost” and somehow that caused the error…
Installed OCS 2.3 via your instructions (helpdesk.gov.kn) . However, unable to get clients to inventory. Tried the steps in exact order. Can you assist?
Thanks Much
Hi Miłosz
How do you do update ocsserver if you have any plugins installed?
Every time I do update ocsserver, plugins do not work and I have to first clean them manually and reinstall them.
Is there any faster way?
I’m afraid not as every plugin, or at least the one we use, makes changes to DB(new tables etc). I would suggest asking OCS team directly. Good point, anyway. I will dive into it
I have tried generating a cert on linux, 2048 bit and 4096 bit with CN=FQDN of server(ocsinventory-ng..com
Have even generated a cert on windows with openssl, but I continue to get the error at bottom when trying to deploy.
Is PS-EXEC required to be installed on all client pcs for this to work?
If not, does anyone have a solution? I have tried asking in irc and haven’t gotten anything to work, have work on this for several days now.
ERROR *** AGENT => Failed to send Prolog
more important is located in download.log in programdata/ocs inventory file. Please provide it. I’m in middle of preparing updated version for debian 9.x and ocs 2.4 with ssl, deploy and ad so stay tuned!
Besides, PS-exec is not required to utilise download/deploy functionality. Never used it to be honest as we run in AD environment. Also keep it mind, that setup is run as SYSTEM account and if you want messages/interaction/warning with end user, systray must be running.
Just wanted to say that I banged my head against this error for weeks:
ERROR *** DOWNLOAD => Failed to download Metadata file”
Had https inventory working, could download the info file via https just fine.
I rebuilt the package and put in the ‘CN’ that was used in the cert for the fragments and https url and then it worked. Just in case others are having the same problem, you may need to review your advice about not changing it.
Having a cert with alt_names that included the ip, did not solve the issue for me.
Hello Henry! Thanks for your comment! Yes, the fragments URI must correspond to cert CN or DNS names. We can adjust default URI in OCS config section in management GUI so no need to adjust/change it every time new deployment is created.
Unfortunately I do not know how your cert looks, therefore why alternative names weren’t trusted but I create them using Windows PKI with CN and DNS names as Alternative addresses like CN=OCS Inventory NG, DNS1=ocsng, DNS2=ocsng.domain.com, DNS3=192.168.1.1 etc and it works. Server cert needs to be attached to ocs package as well. I will be doing new guide for 2.5 and I will try include as many comments and observations as I can:)
Thanks for your findings and comment!
Hi,
thanks for this great tutorial.
But something is wrong. I can’t deploy a package.
There is no one to deploy in the list after selecting computer on the list, and press Deploy.
Validation don’t show any package, but it’s successfully activated and the download URL works.
Can you help me please?
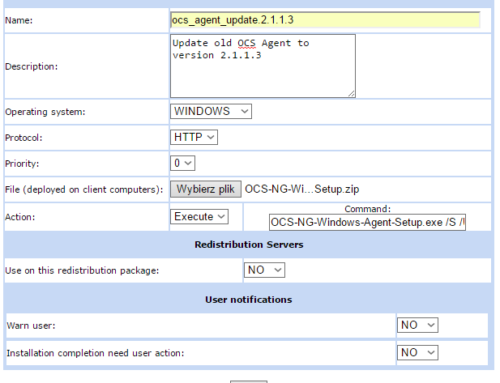
hey, thanks for your comment. Steps that need to be taken in order to deploy stuff are as follows:
Build package no matter what action
activate package in Deployment/Activate menu
affect computer by selecting computer(s) and pressing Deployment/Add package
There should be packages if they are correctly added. Also, you can try with new version of ocs and guide here: https://miloszengel.com/ocs-inventory-ng-2-5-install-guide-on-debian-stretch-with-ssl-and-deployment/
Ok. I try the new one.
Love your work.
What Desktop enviroment should I use? Gnome or Cinammon?
Or better only shell?
Thanks farewell
Upps… I mean Thanks for now…. not farewell.
My englisch is not so good… shame on me
I only use shell for such servers. It is much lighter and boots up faster. I do not use DE at all to be honest(in linux):)
Hello! I have that little problem with computer that failed to communicate with server – agent says “failed sending control message to OCS Inventory Service… Error code 1053”
Can You help with that problem mister Milosz?
==============================================================================
Starting OCS Inventory NG Agent on Tuesday, January 08, 2019 08:44:03.
AGENT => Running OCS Inventory NG Agent Version 2.3.0.0
AGENT => Using OCS Inventory NG FrameWork Version 2.3.0.0
AGENT => Loading plug-in(s)
AGENT => Using network connection with Communication Server
AGENT => Using Communication Provider Version
AGENT => Sending Prolog
ERROR *** AGENT => Failed to send Prolog
AGENT => Unloading communication provider
AGENT => Unloading plug-in(s)
AGENT => Execution duration: 00:00:01.
hey Bartek, please attach ocs inventory agent config file as well as ip address of the server. Also, please specify if server is configured with SSL and what message is displayed when accessing http(s)://ip_or_name_of_ocs/ocsinventory using web browser.
[OCS Inventory Agent]
ComProvider=ComHTTP.dll
Debug=0
Local=
NoSoftware=0
HKCU=0
NoTAG=0
IpDisc=
[HTTP]
Server=https://10.95.9.131/ocsinventory
SSL=1
CaBundle=cacert.pem
AuthRequired=0
User=
Pwd=
ProxyType=0
Proxy=
ProxyPort=0
ProxyAuthRequired=0
ProxyUser=
ProxyPwd=
[OCS Inventory Service]
TTO_WAIT=17640
INVENTORY_ON_STARTUP=0
********************************************************************
Bad Request
Your browser sent a request that this server could not understand.
Apache/2.4.10 (Debian) Server at 10.95.9.131 Port 443
I configured server exactly as you did including SSL.
ERROR *** AGENT => Failed to send Prolog
ERROR *** AGENT => Failed to send Prolog SSL peer certificate or SSH remote key was not OK
from agent log
yes, this seems to be cert issue. You can set ssl=0 and change url to http instead of https for testing. Also, please refer to here:
https://miloszengel.com/ocs-inventory-ng-2-5-install-guide-on-debian-stretch-with-ssl-and-deployment/7/
as this is updated version of the guide. Keep in mind, that cacert.pem is in fact certification authority cert or full chain – not the server cert unless the cert is self signed
[…] again, it’s been a while since my last guide for OCS Inventory NG but since OCS Inventory team released version 2.5 I decided to update my guide, well rewrite it […]
inventory.log and download.log tells me this who can help me
Starting OCS Inventory Package Download and Setup Tool on Saturday, February 13, 2021 00:07:25.
DOWNLOAD => Running OCS Inventory Download Version 2.8.0.0
DOWNLOAD => Using OCS Inventory FrameWork Version 2.8.0.0
DOWNLOAD => Using network connection with Communication Server
DOWNLOAD => Using Communication Provider Version
DOWNLOAD => Starting new period of 10 cycles
DOWNLOAD => Parsing directory for packages
DOWNLOAD => No package found, exiting
DOWNLOAD => Unloading communication provider
DOWNLOAD => Execution duration: 00:00:00.
AGENT => Inventory successfully sent
AGENT => Communication Server asked for Package Download
ERROR *** DOWNLOAD => Failed to download Metadata file to
DOWNLOAD => Download and setup tool successfully started
AGENT => Unloading communication provider
AGENT => Unloading plug-in(s)
AGENT => Execution duration: 00:00:07.